
A favicon is the small icon that appears in browser tabs and bookmarks, helping visitors recognize your site quickly. This guide shows you how to convert and resize an image file into an ICO favicon using the Image Converter tool in Braandly.
Before you start
Make sure you have the image file saved on your device. The converter accepts PNG, JPEG, WebP, GIF, BMP, SVG, HEIC, HEIF, PDF, and JFIF.
Start with a square image. Anything that is not square is cropped from the centre to make it square, without warning, so a wide logo can lose its edges. Crop it yourself first if that would cut off part of the mark.
Favicon sizes that matter
Favicons are rendered at small sizes depending on where they appear:
- 16x16 pixels: Used in standard browser tabs and address bars.
- 32x32 pixels: Used for desktop shortcuts and high-resolution browser tabs.
- 48x48 and 64x64 pixels: Used by some browsers and operating systems for larger shortcut icons.
- .ico format: The standard multi-size container file format supported across web browsers.
Braandly offers those four sizes, and puts every size you tick into a single .ico file.
Convert and prepare your image
-
In your workspace sidebar, select Brand Identity Tools.
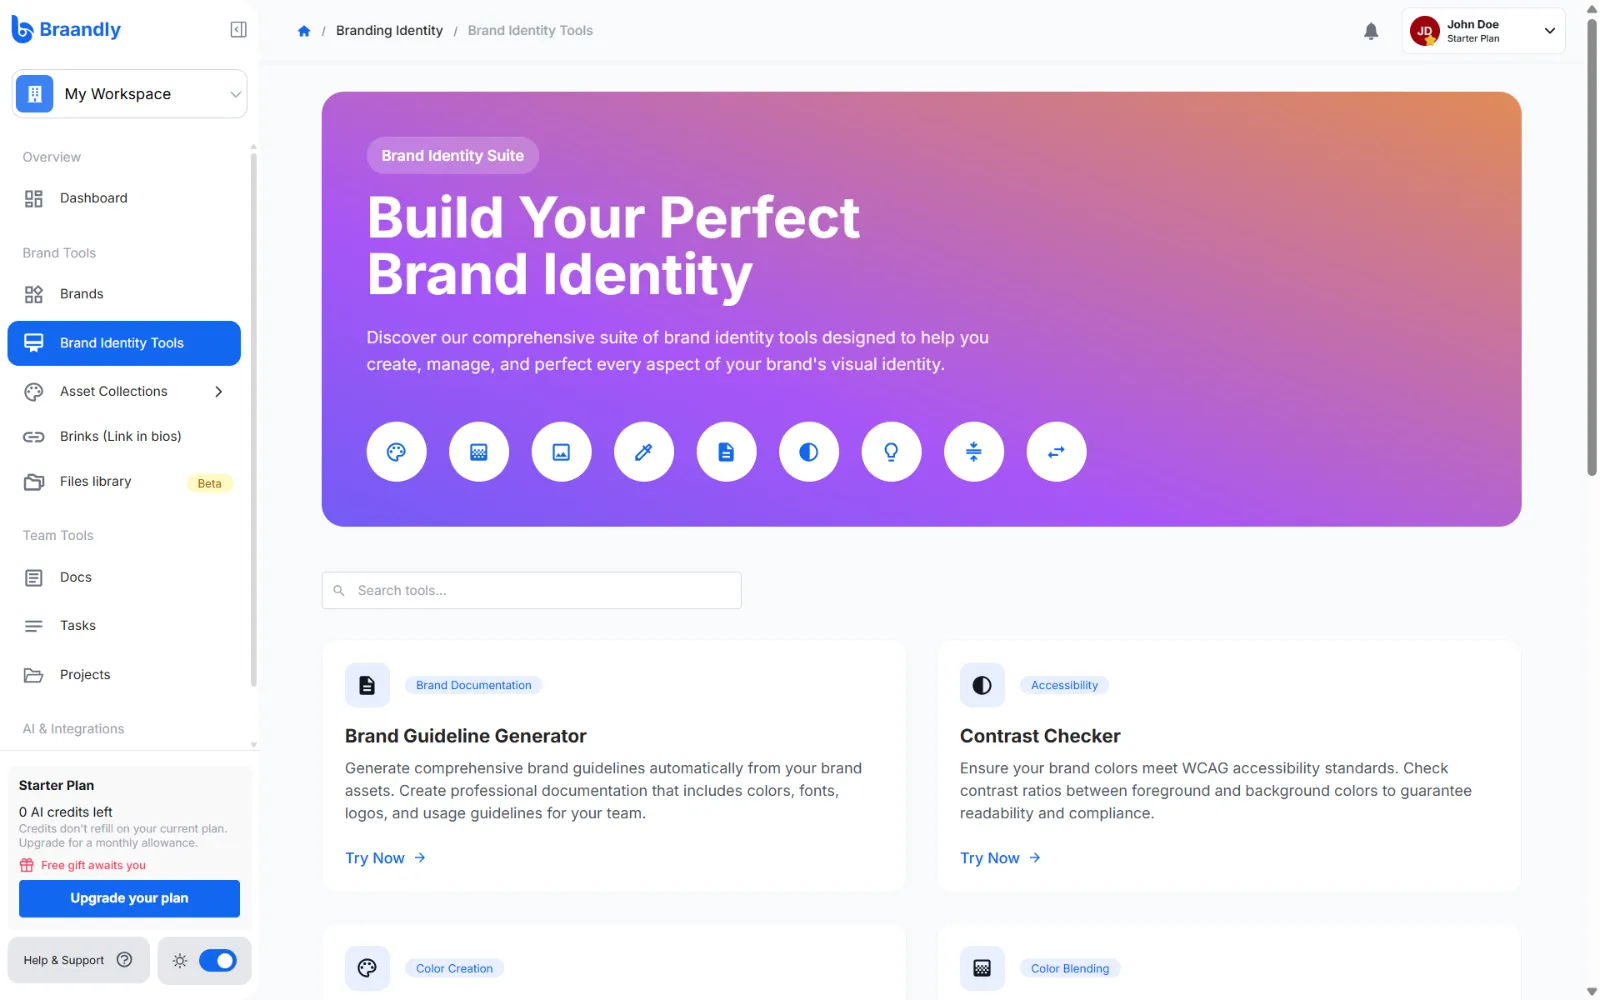
-
Click Image Converter.
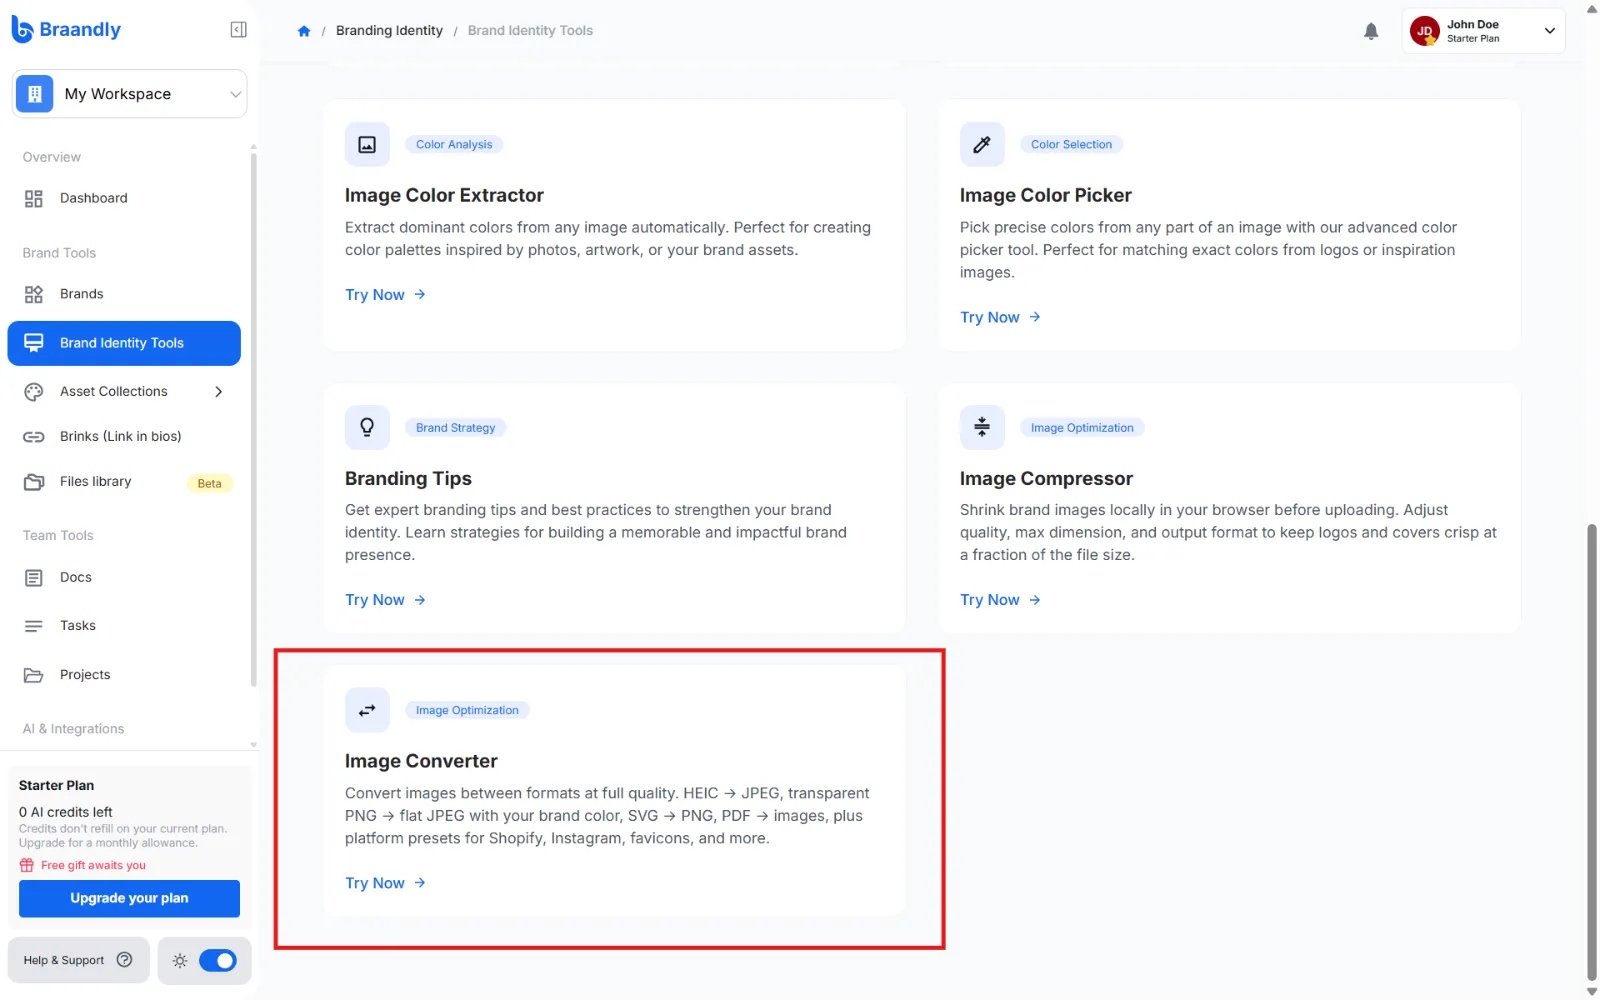
-
Click Browse image to upload your source image file from your computer.
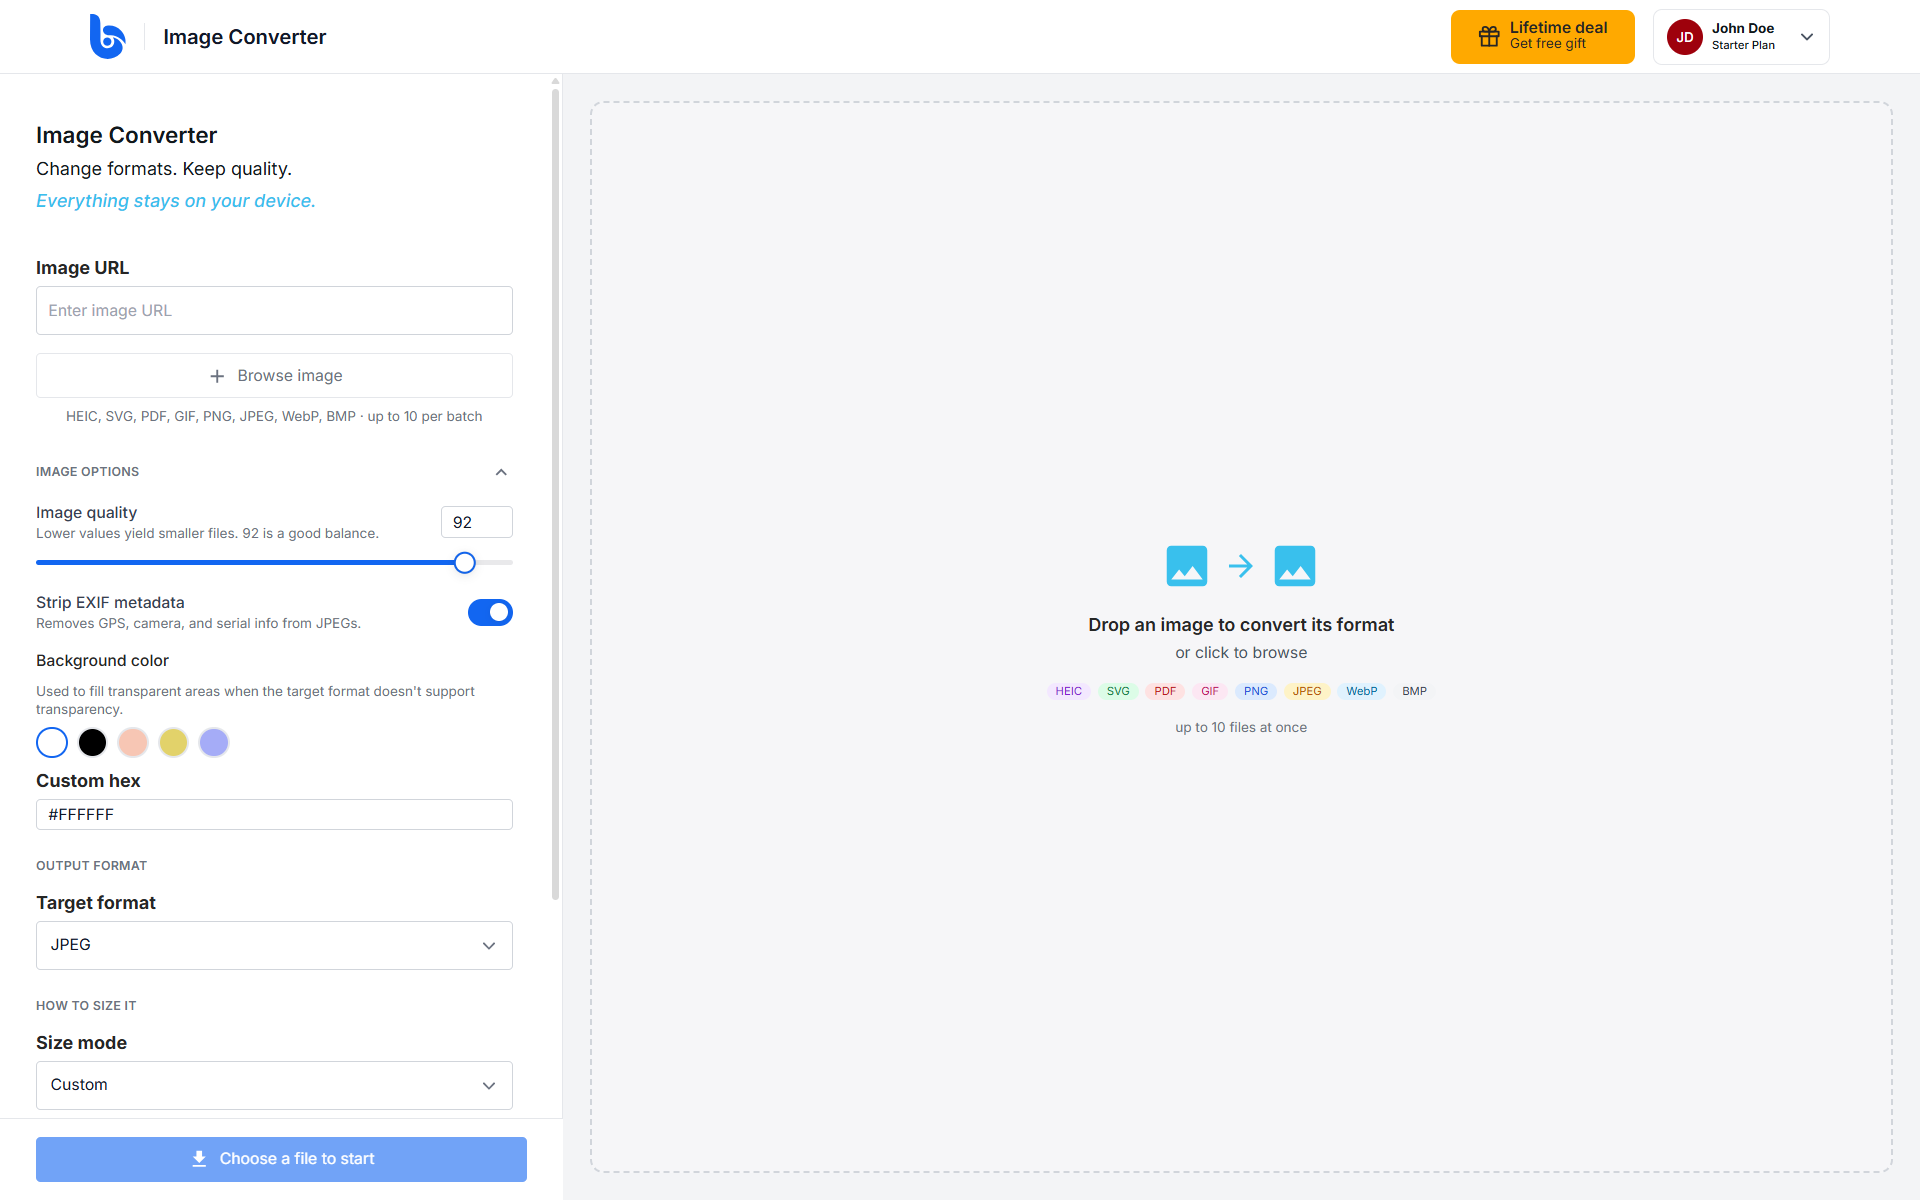
-
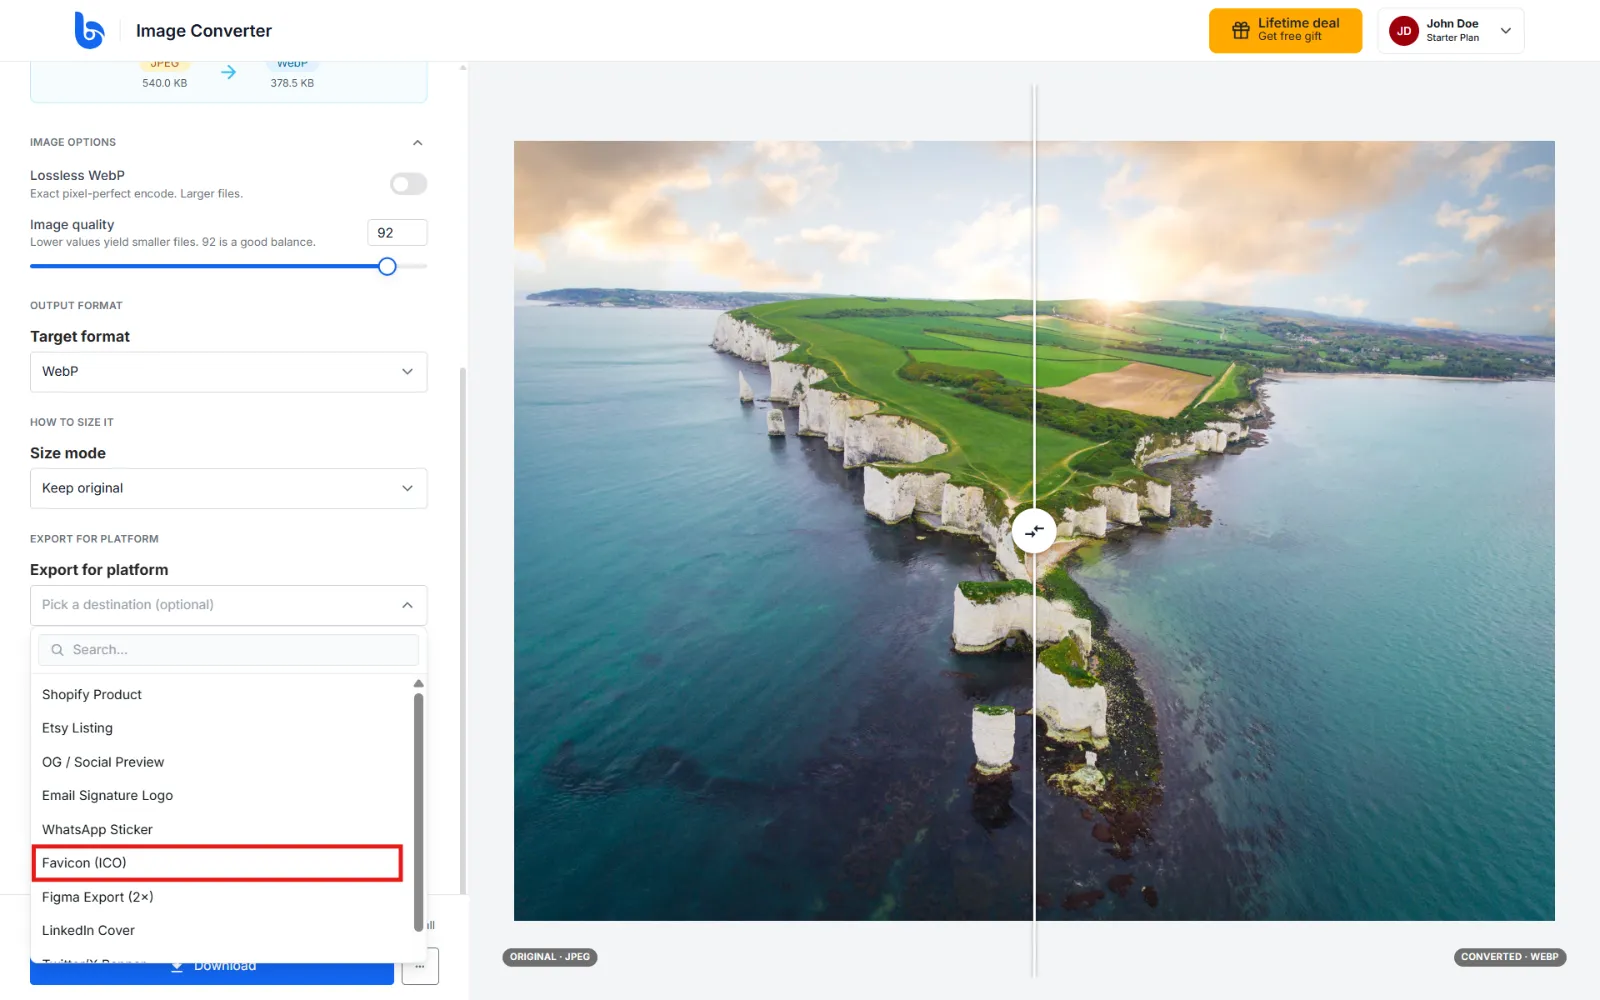
Scroll down to the Export for platform field and click it.
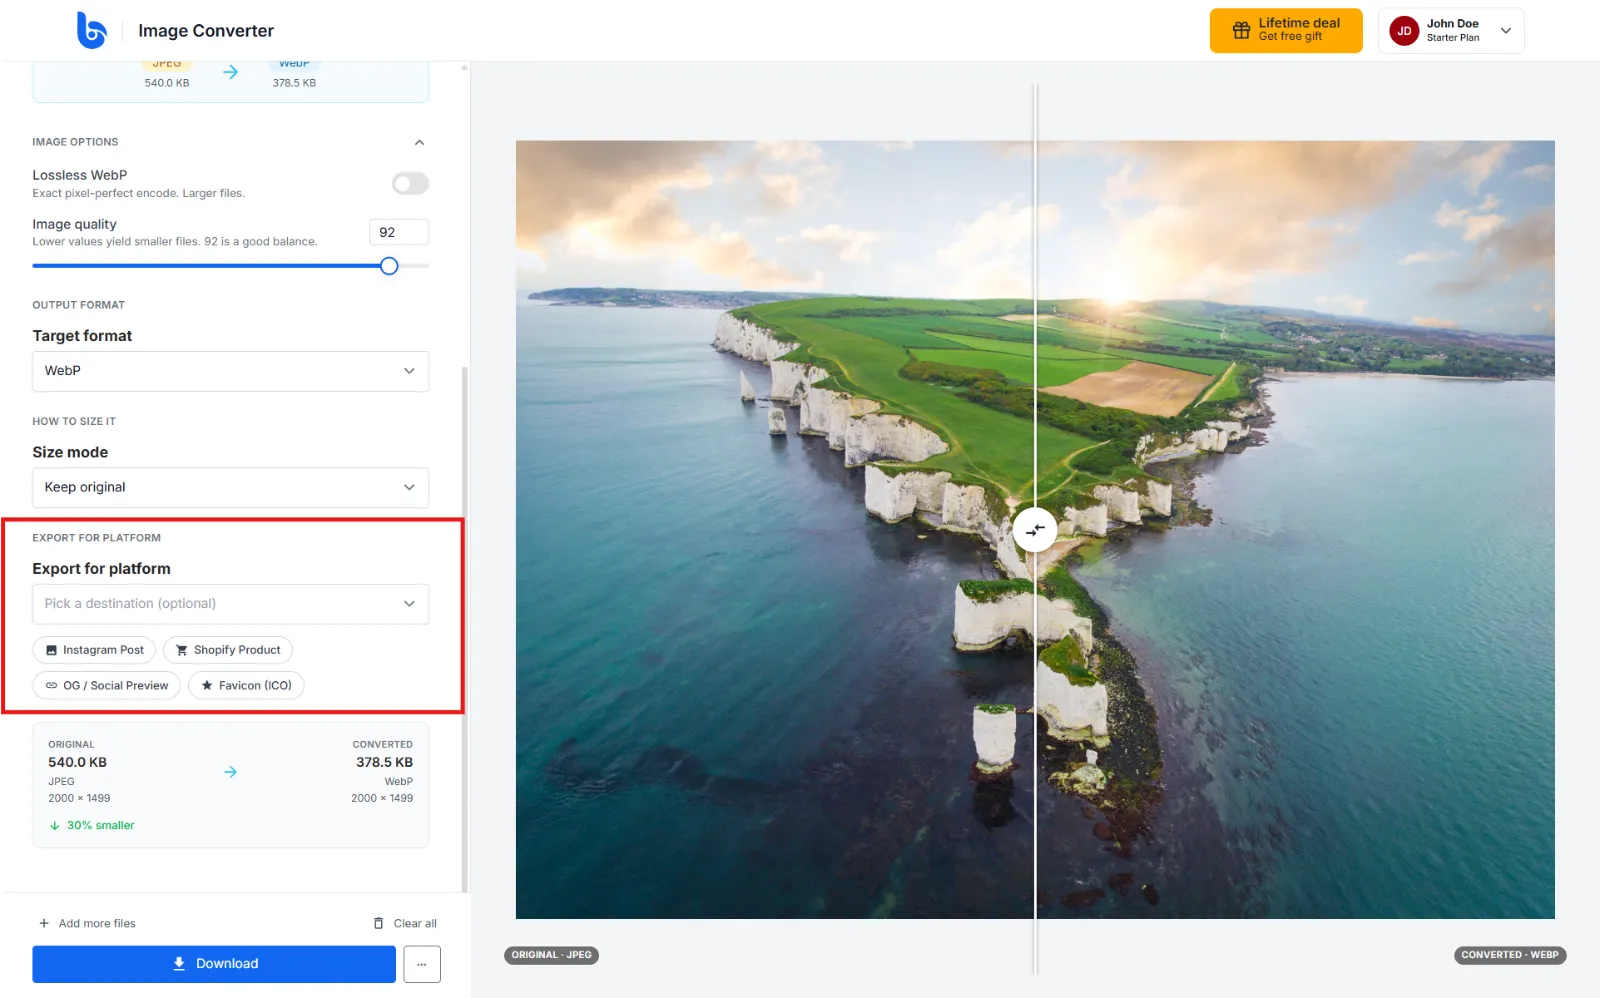
-
Select Favicon (ICO) from the options. This sets the output format to ICO and ticks all four sizes for you.
-
To change which sizes are included, scroll back up to Image Options and tick or untick them under ICO sizes. Every ticked size goes into the same file, so you download one favicon rather than one file per size.
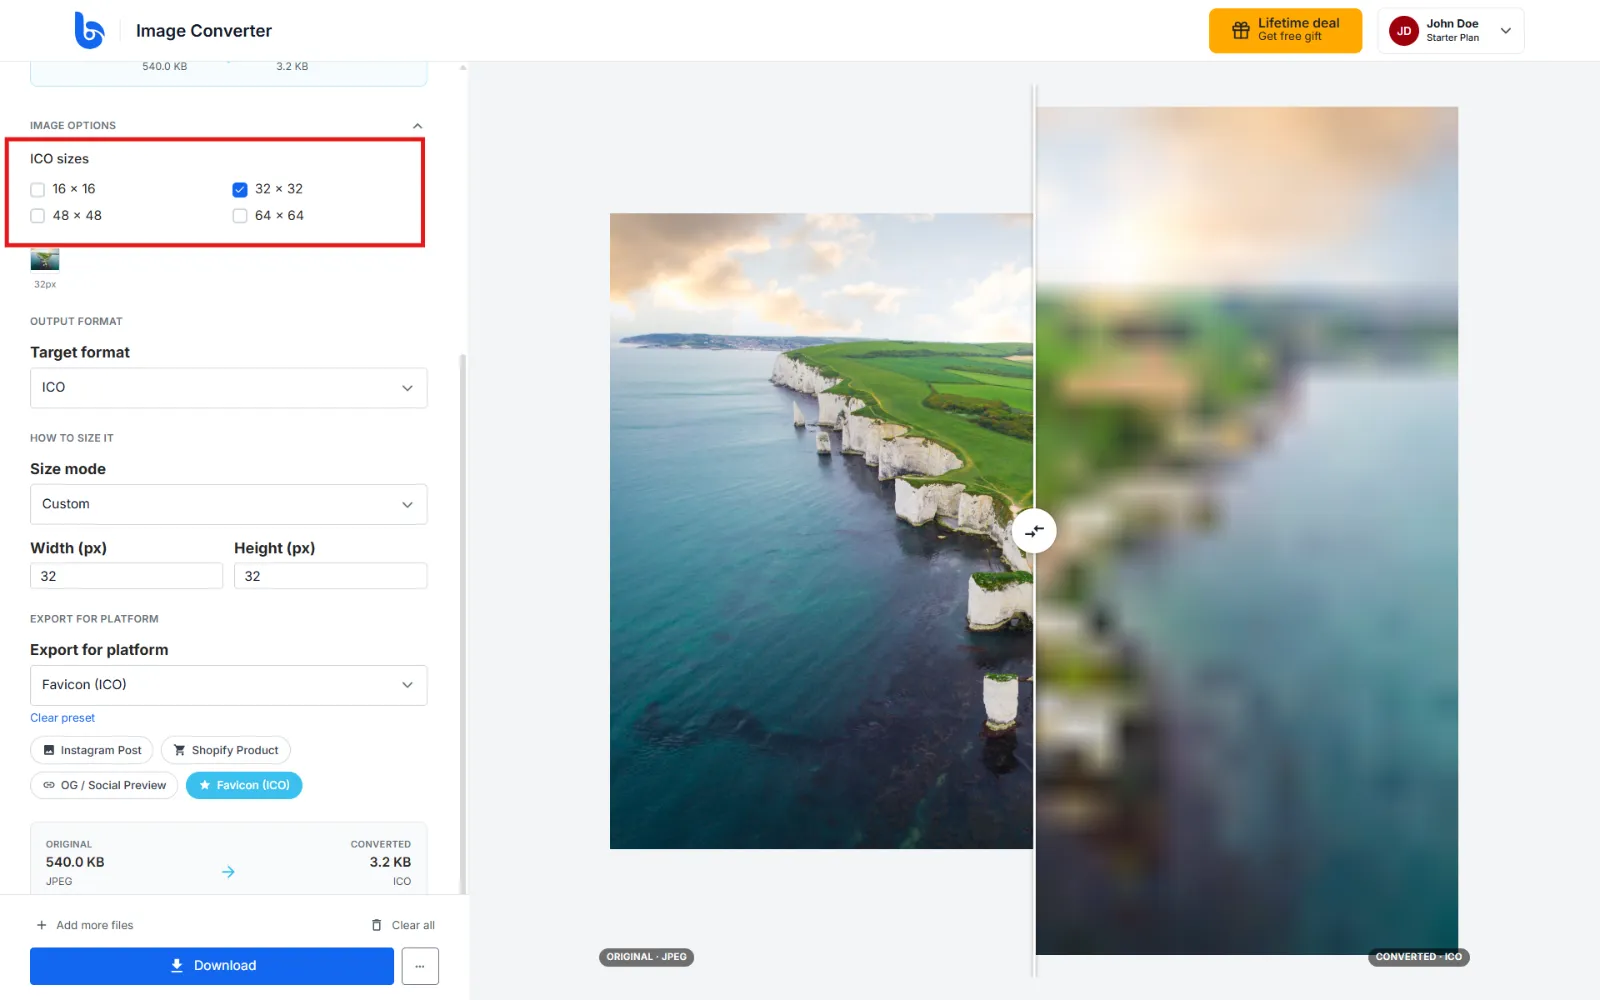
There is no convert button. Your favicon regenerates automatically each time you change a setting, and Download saves the current result. The Image Options section sits above Export for platform and can be collapsed, so expand it if you do not see the size checkboxes.
Save, copy, or export your favicon
Once your ICO sizes are set, choose how you want to save or use the resulting favicon:
- Download the file: Click Download to save the favicon to your computer.
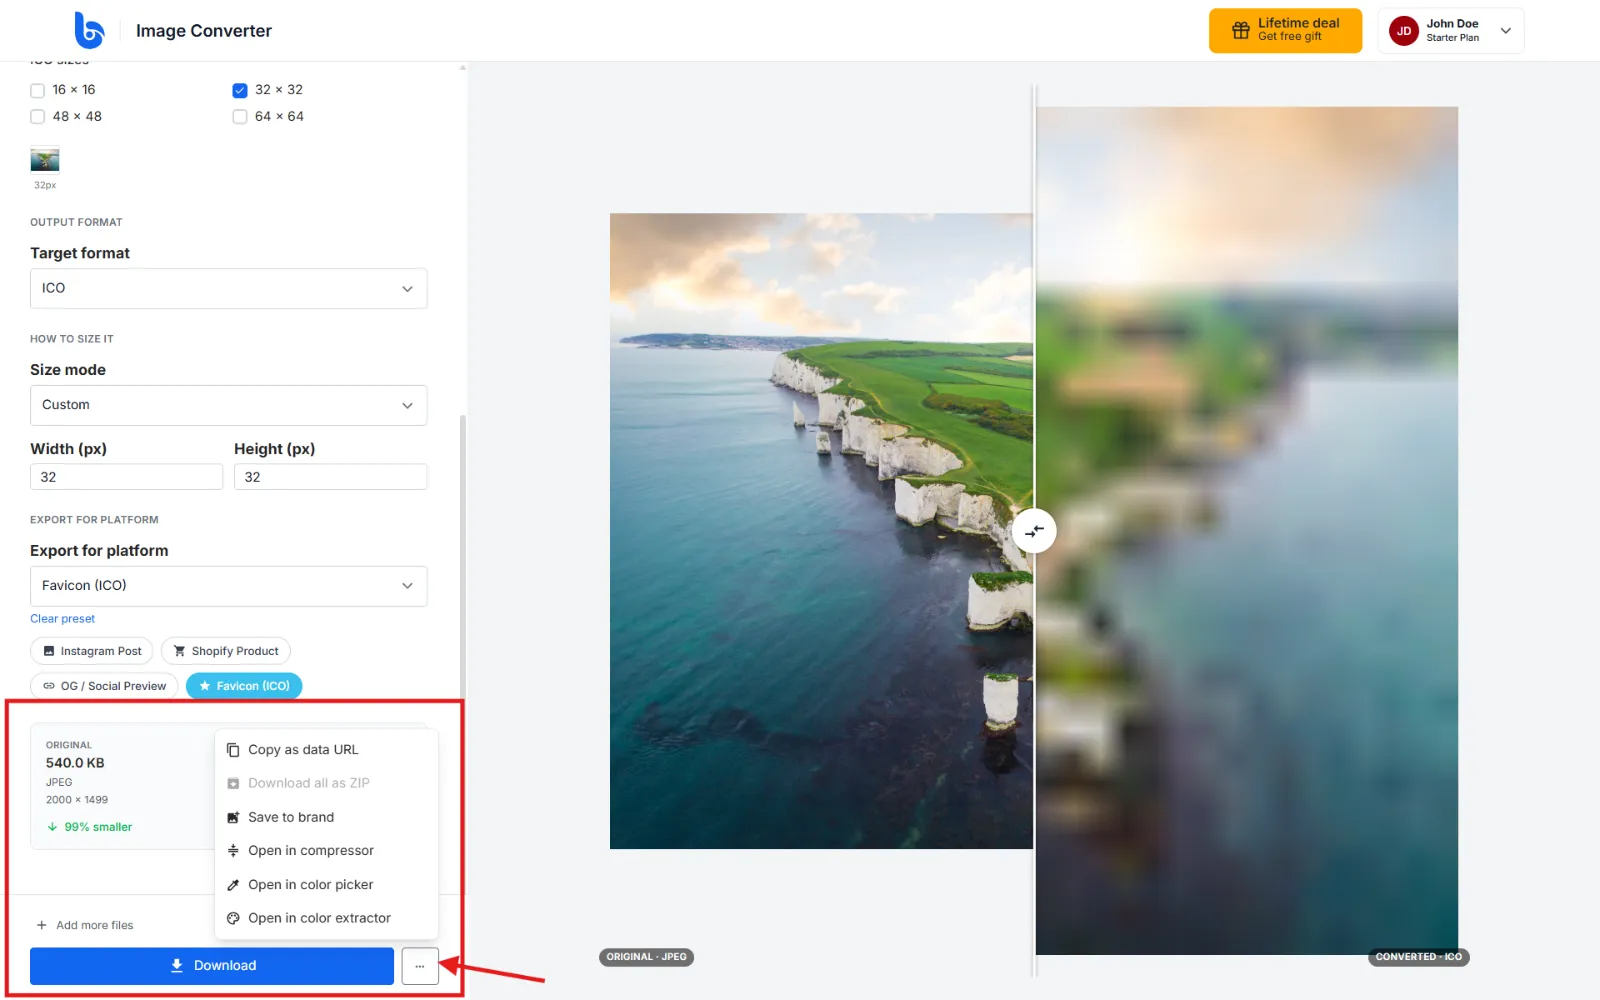
- Save to your brand assets: Click the action menu button next to Download, then click Save to brand.
- Copy as a data URL: Click the action menu button, then click Copy as data URL to copy the encoded string to your clipboard.
- Extract brand colors: Click the action menu button, then click Open in color extractor to pull the color palette from your icon.
The same menu also offers Download all as ZIP, Open in compressor, and Open in color picker.
Save to brand requires you to be signed in, and an .ico file can only be saved to the Icon slot. The dialog defaults to Logo, which rejects ICO files as an unsupported type, so change the slot before confirming. Brand assets must also be under 2 MB.
Favicons typically display at small sizes such as 16x16 or 32x32 pixels in browsers. Starting with a clear, square, high-resolution source image ensures your icon remains crisp when rendered.
Adding the HTML link tags
The downloaded file is named after your source image, so rename it to favicon.ico first. Then upload it to your website's root directory and place the following HTML tags inside your site's <head> section:
<!-- Standard ICO Favicon -->
<link rel="icon" href="/favicon.ico" sizes="any">
How to test your favicon
After adding the HTML tags to your site, test your favicon using these methods:
- Open a new browser tab, clear your browser cache, and visit your website URL.
- Check your site in multiple web browsers (such as Chrome, Safari, and Firefox) to confirm the icon renders in the browser tab.
- Bookmark your page to verify that the icon appears alongside the bookmark title.
Troubleshooting
Why does my favicon look cropped? Non-square source images are cropped from the centre. Crop the image to a square yourself before converting.
Why was my file rejected when saving to a brand? ICO files only fit the Icon slot. Change the asset slot in the dialog, and check the file is under 2 MB.
Where is the ICO size list? Inside Image Options, above the Export for platform field. The section may be collapsed.
My browser still shows the old icon. Browsers cache favicons aggressively. Clear your cache, or open the site in a private window.
Next steps
Now that your favicon is ready, see How to compress an image to compress larger images for web use, or Convert image formats for the converter's other options.