
A workspace is where your brand's assets, guidelines, and work live. This guide walks you through creating a new workspace for your team or client.
Create a new workspace
-
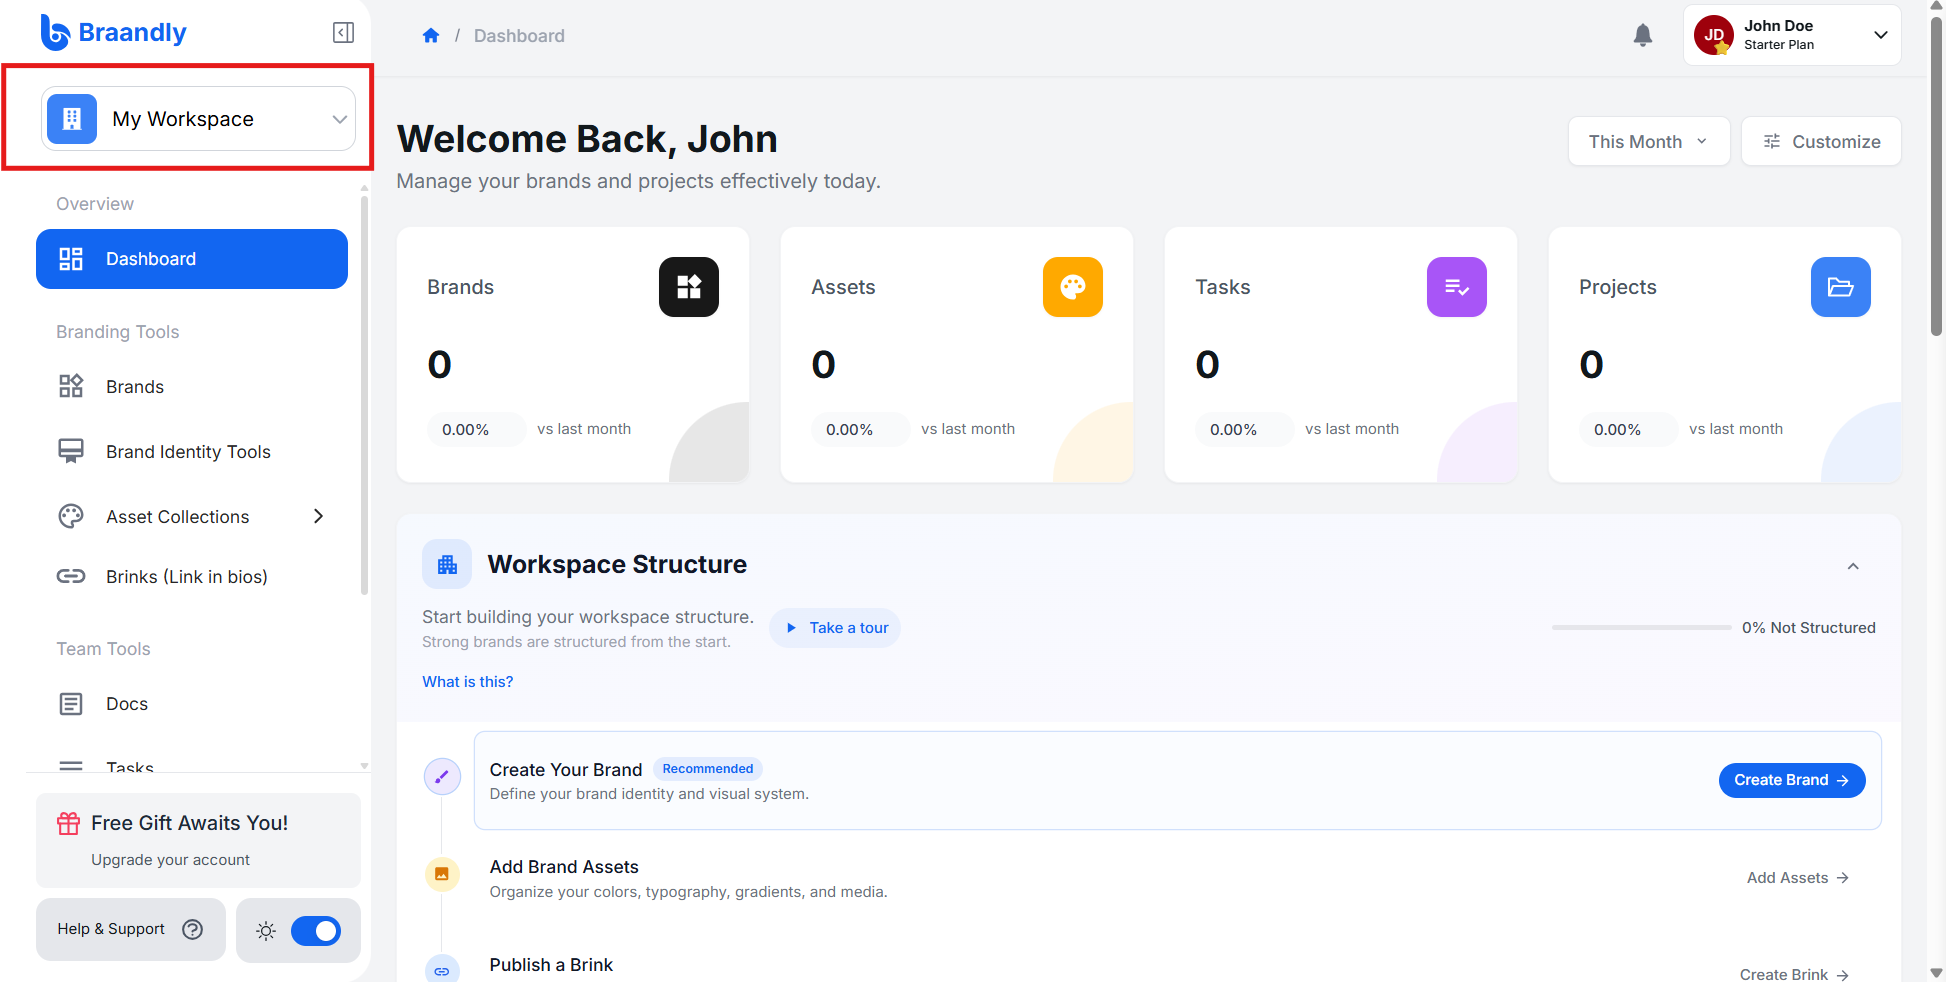
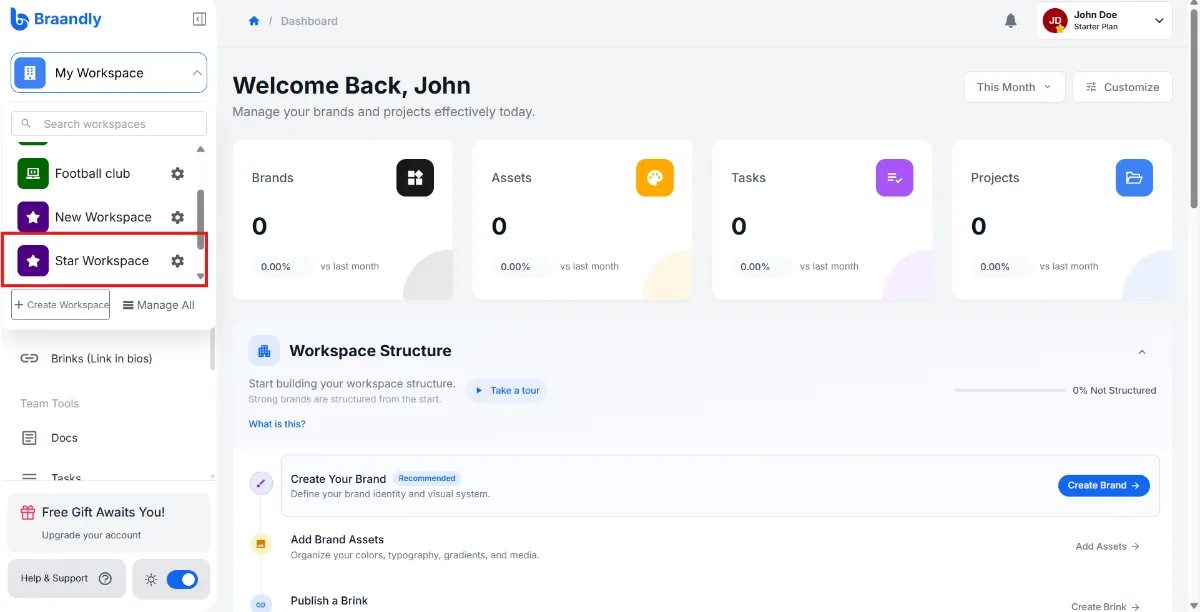
On your dashboard, click your workspace icon in the top left corner.
-
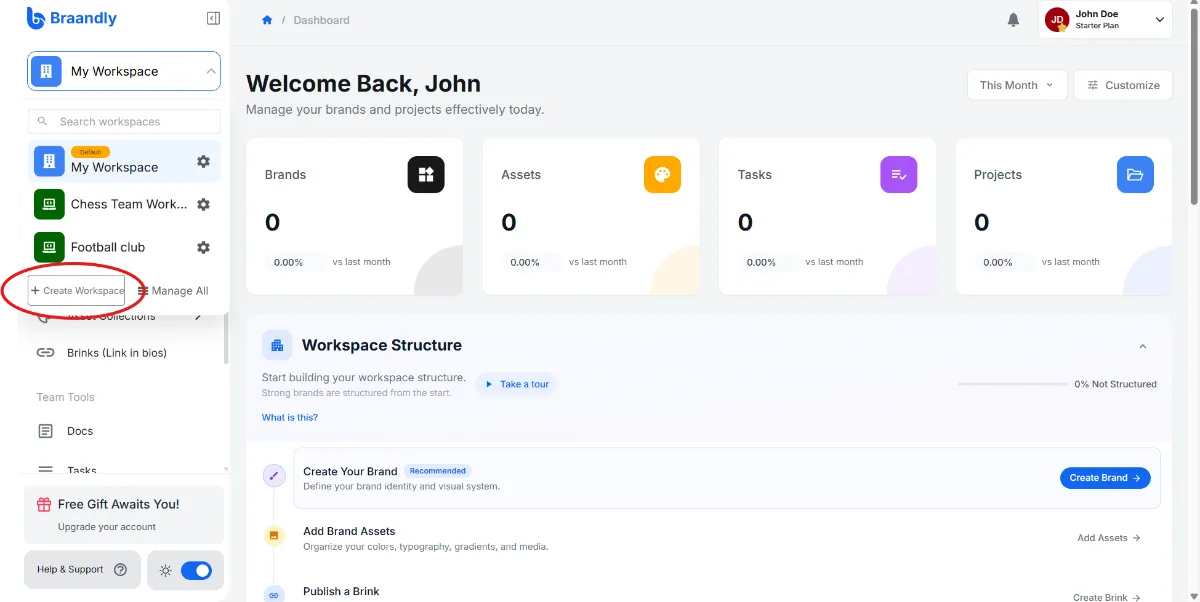
Click the Create Workspace button from the dropdown.
-
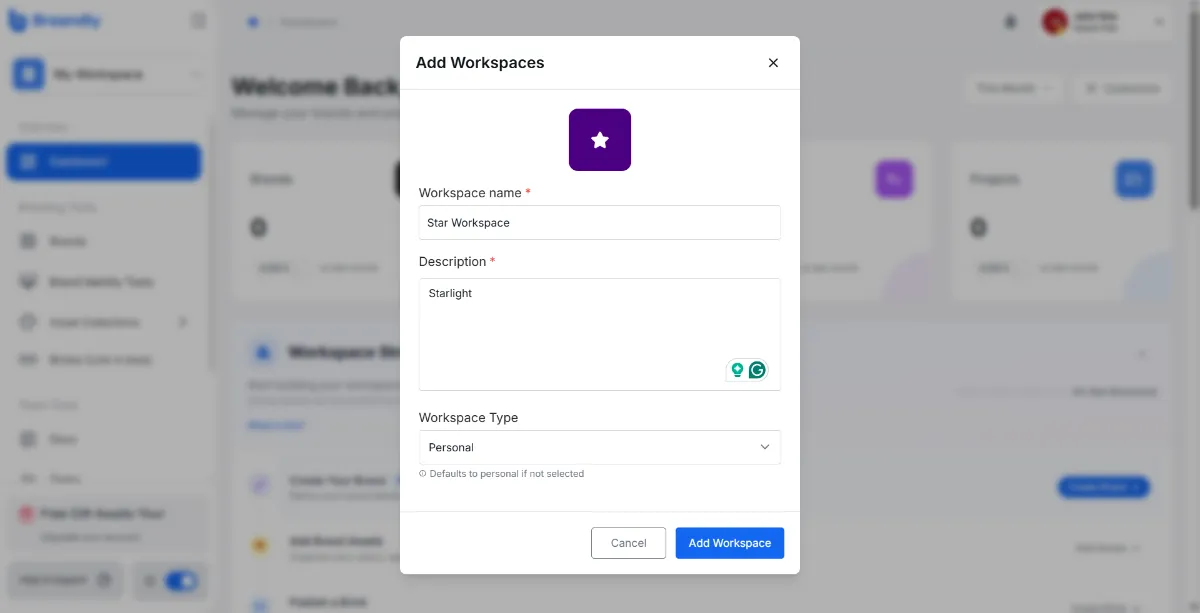
Enter a workspace name, description, and choose a workspace type. The workspace name is usually your company or team name.
-
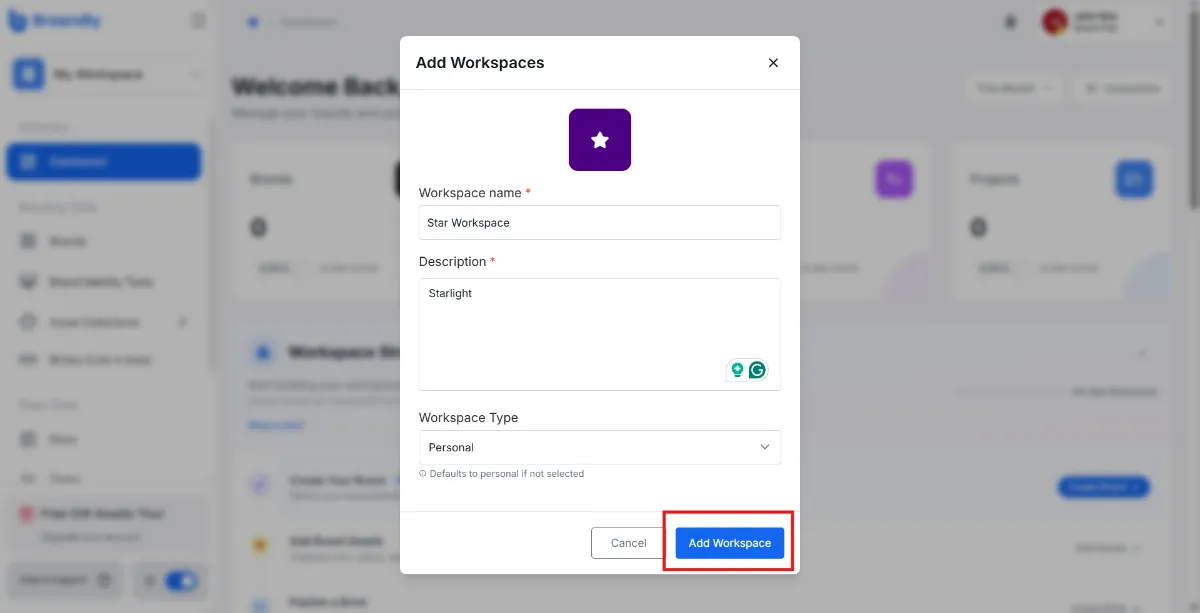
Click Add Workspace. A pop-up appears that your workspace has been created successfully.
The new workspace has been created. Navigate to the new workspace by clicking the workspace icon in the top left corner and selecting it from the dropdown.
Next steps
With your workspace set up, you can start inviting team members. See Invite members to a workspace to get started.